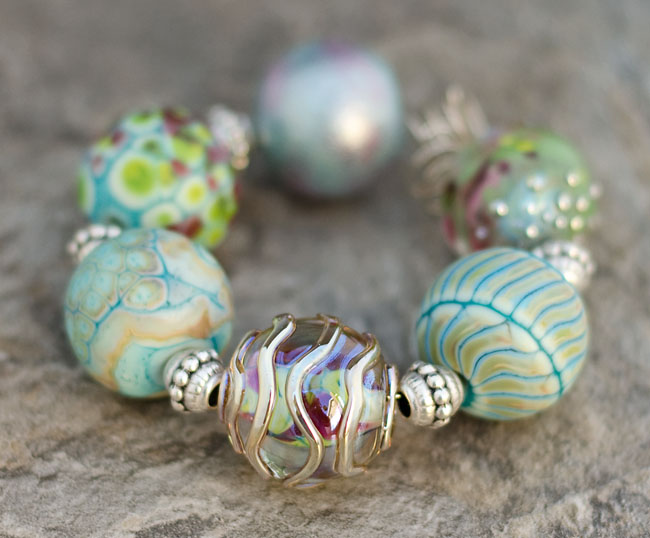
I recently stumbled upon a neat trick that transforms simple colored glass frit into a washed watercolor effect on a reactive glass base! The technique produces translucent pools of color that take on a unique, one of a kind look with every bead. 😀
BOUGAINVILLEA – big hole beadFLAMENCO – big hole beadPAINTER’S PALETTE – big hole beadROSE GARDEN – big hole beadSEA WIND – big hole bead
Here’s a bead I made using an old tried-and-true technique which always produces great results and a unique look – combining dark ivory glass with fine silver foil. It turns ordinary glass into what looks like natural stone.
With Fall approaching I thought these pendants would be pretty with some soft colors reflecting the season. Maybe if wish for it hard enough Fall will come early for us this year! 😀 It’s definitely a lot cooler in the mornings but by mid afternoon we’re still reaching the high 90’s 😦
Harvest Flower – drop pendant necklaceHyacinth – drop pendant necklaceSunflower Bud – drop pendant necklace
The older I get the more I appreciate and am drawn to older things. They remind me of an era gone by and seem to hold so much more value than something brand new since they are already well used.
With this new scroll design, I have tried to recreate that antique feel and old-fashioned look of yesteryear. I look forward to incorporating this pattern into many more of my beads! 🙂
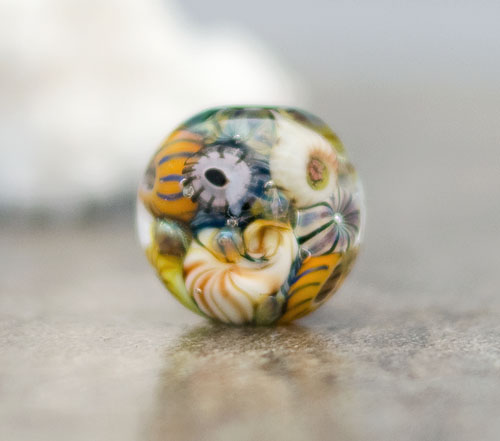
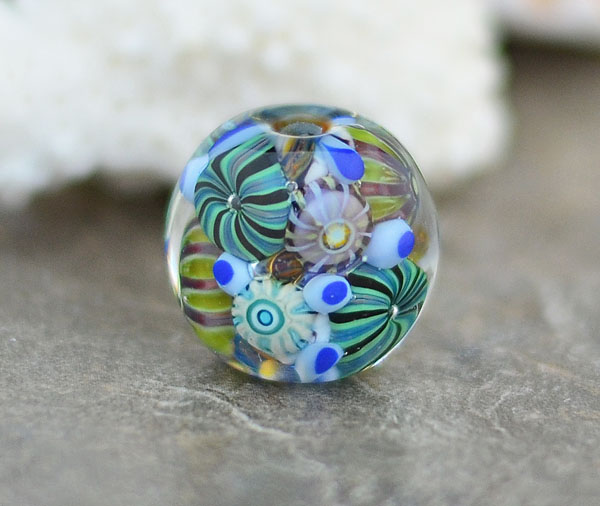
MAKING BEAUTIFUL MURRINI” Step-by-Step Tutorial
by Christina Catherine of CCGlassArt
Includes:
**Over 100 color photographs**
**More than 50 pages of instruction**
**Four murrini recipes including my super popular Starlight Murrini recipe**
**A Torch-Side Reference Guide**
…and SO much more!!
This tutorial is for every lampworker who has wanted to make murrini but didn’t because they were intimidated by the process, or perhaps has tried making murrini – spending many hours at the torch and using up lots of glass – only to be disappointed with the end result.
I was one of those lampworkers myself. I spent more hours and wasted more glass than I care to admit making hundreds of murrini canes with nothing worth using to show for it. Until, after much trial and error, I finally developed a fool-proof method and a series of reliable techniques, tips and tricks that helped me produce consistent results every time.
Once you learn to successfully make your own murrini cane the sky’s the limit! You can make custom designs anytime you want, in any colors you want. You can make murrini specifically for the style of beads you create.
You will be able to set your beads apart from the crowd making them more unique and individualized with murrini in color combinations and patterns you develop that are unavailable anywhere else.
You can even sell or share your extra murrini with other lampworkers (or fusers)!
Topics covered this tutorial include:
*Learn to create a 5 layer murrini design with up to 24 outer stripes (that will look like 48!)
*Choosing the best colors (I use COE 104 but you can easily adapt these tips and techniques to other COE glass)
*How to know which colors will work well together (and which colors to avoid)
*The entire process of making murrini cane from start to finish, step-by-step
*How to remove trapped air bubbles from encasing
*Getting multiple stringer lines spaced evenly and straight all the way around
*What to do when your stringer pops off unexpectedly
*Pulling the cane to a uniform diameter
*What to do with waste glass leftover from making murrini cane
*How best to apply murrini chips to your beads
…and tons more…
Making murrini can be intimidating but it doesn’t have to be. When broken down into easy-to-follow instructions, (with color photos guiding you every step of the way), you will have all the information you need – and the confidence – to successfully create beautiful, miniature designs in murrini that will take your beads to the next level.
This tutorial is written with the intermediate to advanced glass artist in mind who is well familiar with all aspects of lampworking including working with an open flame, melting glass rods, all safety precautions, etc.
However, if you consider yourself a beginner and are thinking about purchasing this tutorial but are unsure if you will benefit from it, please contact me. I may be able to help you decide if this tutorial is right for you at your current level of experience. 🙂