In this video I make a small bead with my own handblown shards!
Shards are thin sheets of blown glass that can be wrapped around beads to add interest and detail to a design. I used shards quite a lot back when I was making large focals. But applying them to small beads can be a bit tricky. Especially if you are using reactive shards that tend to move while they melt in the heat of the flame.
I hope you enjoy it!
Please note: This video is a demonstration for entertainment purposes only.
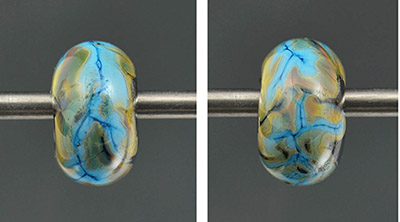
A photo of the finished bead after kiln annealing…
Here’s another YouTube video I made while testing murrini. Whenever I make murrini I always test it on white glass to see a true representation of the colors. Also it helps me to see how the murrini behaves in the flame and when applied.
Here are some pictures of the murrini I used during the video after kiln annealing –
There is no speaking or teaching in this video, it is just a demonstration for entertainment purposes only.*
*Because this video is only a demonstration for entertainment purposes, and not for instruction as a tutorial, I will not be offering any advice or information as to the colors, tools or techniques I use. If you learn something new, that’s great! But the video is really just for your enjoyment.
Disclaimer: please do not attempt these techniques unless you are well skilled in working with molten glass in an open flame – if you do try these techniques you assume all responsibility for the outcome of your efforts and agree that you are aware of and will comply with any and all safety precautions associated with making glass beads including but not limited to proper ventilation of your work environment, wearing safety glasses and appropriate clothing, use of an open flame, working with hot glass, being careful around sharp glass, etc., etc… CCGlassArt cannot be held responsible for any negative results you may incur attempting these techniques.
This is something I’ve been planning to do for a while…YouTube Videos! 🙂 I knew I wanted to give my glass bead fans a peek behind-the-scenes of what I do, and video is a great way to do this.
I quickly discovered that not all the beads I make are well suited to video. My encased murrini beads, for example, will not work for this. I found I move around way too much when making those beads for the video to even be watchable, (a.k.a. ‘Whiplash Productions’, as my father-in-law calls videos that are all over the place they practically make you dizzy, LOL! 😀 ) Don’t worry though, I have lots of other projects planned that should work well with the video format.
One thing to note, these are not instructional, tutorial-type videos. I really wanted the videos to be for entertainment purposes only so that everyone could enjoy them, not just glass-artists. Therefore, I won’t be offering any information as to the materials, tools or techniques I use in the videos. I also have to have a disclaimer for those glass artists who may want to duplicate these techniques, (see below).
I will work to improve these videos as I go along so they are more enjoyable – trying to reduce background noise, and better centering the video screen over my work area, etc.
Thank you for watching!
The finished bead after annealing:
Disclaimer: please do not attempt these techniques unless you are well skilled in working with molten glass in an open flame – if you do try these techniques you assume all responsibility for the outcome of your efforts and agree that you are aware of and will comply with any and all safety precautions associated with making glass beads including but not limited to proper ventilation of your work environment, wearing safety glasses and appropriate clothing, use of an open flame, working with hot glass, being careful around sharp glass, etc., etc… CCGlassArt cannot be held responsible for any negative results you may incur attempting these techniques.
With the type of glass I use it is often tricky to find a wide selection of nice, rich purple colors. You usually have to get pretty creative layering different colors of glass to achieve the shades you’re after. This batch of beads was a challenge to see how much variation of purple I could get into each bead without repeating the same murrini too often.
This resulted in a nice mix of purple, violet, lilac, lavender and other colors that went nicely together such as amber, ivory and purple; aqua, indigo blue and purple, etc.
Unfortunately there aren’t many beads to choose from in this batch – not because of the issue with purple glass, but mainly because of our hot summer weather!
In years past I have taken the entire summer off from torching because it is nearly impossible to do when it’s 100+ degrees. Especially when you add on the heat coming off the torch, kiln, and bead warmer! And the older I get, the less tolerant I am of these conditions and would just rather hibernate in the air conditioning until the weather changes. 😀
But when you have a passion for making beads, and have new ideas that are nagging at you, it’s hard to wait out the heat. Our high summer temperatures typically last well into October and sometimes early November!
This summer has been no different heat-wise. But I have been trying to catch a cool-ish morning or two now and then so I can torch for at least a little while. This way I have some beads to share, as few as they may be…
The older I get the more I appreciate and am drawn to older things. They remind me of an era gone by and seem to hold so much more value than something brand new since they are already well used.
With this new scroll design, I have tried to recreate that antique feel and old-fashioned look of yesteryear. I look forward to incorporating this pattern into many more of my beads! 🙂